There used to be a time when getting a mail through post was a big deal. Well of course it took time to come all the way to your house but, it came.
And it was the only mode of communication. Then came the telegraph. The telephone was the next but, of course we don’t use it official communications. The next awesome thing that came for official communication was the email.
Now, email by no means is instantaneous but it is a lot quicker than a post.
Gmail is one the biggest mailing services used all around the world. Almost every person connected to the internet has a Gmail account. Even though it is used worldwide, it lacks one feature that other important mail services have: scheduling mails. Say you didn’t have access to the internet and you just remembered that you had to mail your employer. You can easily draft a mail and ask Google assistant (or Siri) to remind you to send it later. What if you weren’t available to do so? No matter how much your smart phone reminds you that you have send the mail, what if you were too occupied to notice?
Well, obviously, the mail won’t be sent in time and your employer will roast you for it.
That would not be good. Nobody enjoys being shouted at. So, here is a solution for everyone out there who is looking to schedule an email in Gmail. . You can now schedule mails. Below are five steps to schedule an email.
Step 1: Install an extension called Boomerang.
Boomerang is an extension that schedules your email and sends it on time. You can also keep sending the same email again at a scheduled time. Below is the link to the site.
http://www.boomeranggmail.com/
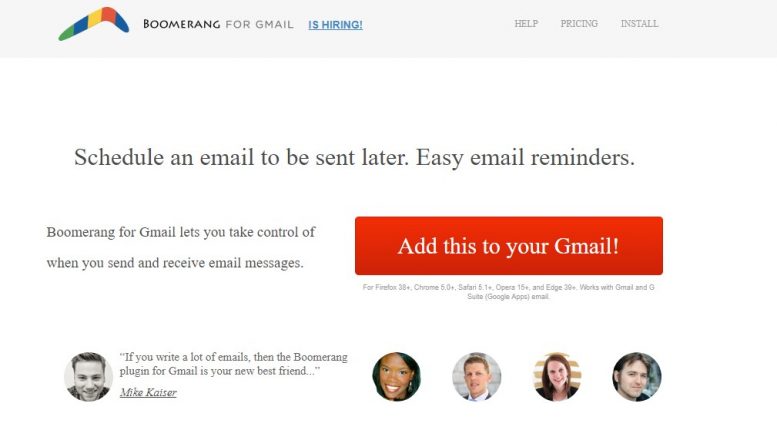
Click on ‘add this to your Gmail!’ tab. You will be led to chrome’s web store.
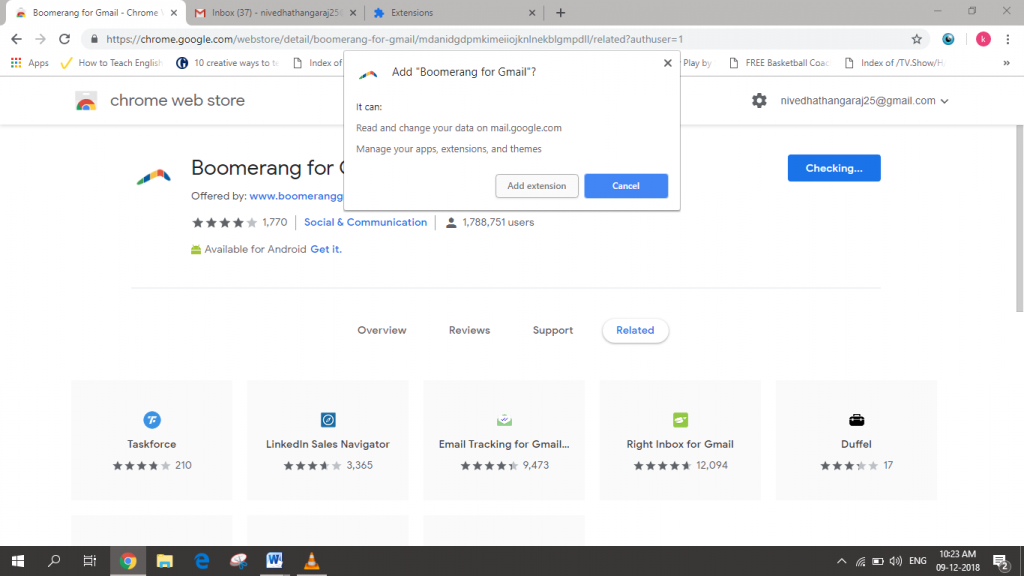
Then click on the ‘add to chrome’ tab. Chrome will ask you if it should add ‘Boomerang for Gmail’. Click on ‘Add extension’ tab. Let Chrome check and install the extension. You can always remove the extension in Chrome’s settings.
Boomerang is also available for android and ios. Just search Boomerang for Gmail in play store and install the app.
Step 2: Reload Gmail
Once the extension is installed, a new tab will open your inbox.
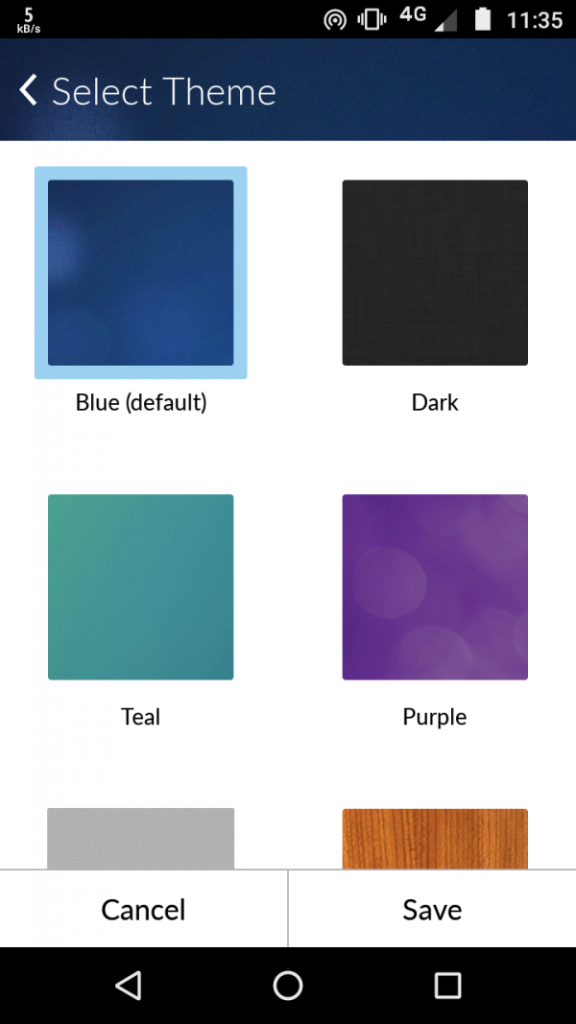
In android, open the app and go through the introduction. Select your favourite theme and your inbox will be open.
Step 3: Create your email
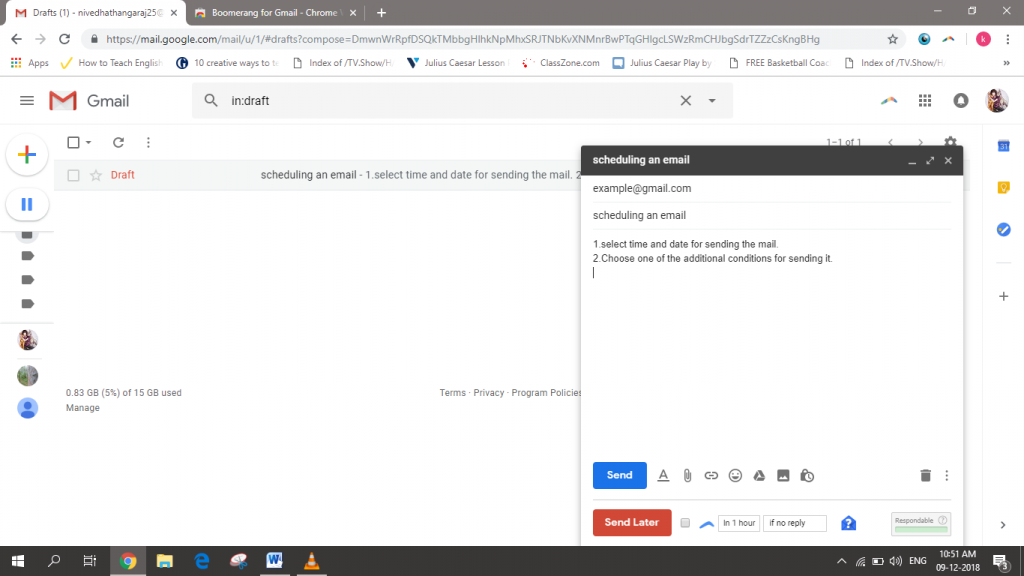
Compose your email like always. It is one thing that is never going change. A personally typed mail goes a long way. An employer always appreciates you typing out your mail instead of sending a typical copy-pasted mail. Once you have composed your mail and proof read it, click on the send later tab.
The same goes for android users too. If you don’t want the receiver to know that the mail was scheduled, remove the automated quote ‘Typed with thumbs and sent with love from Boomerang’ before scheduling the mail.
Step 4: Select date and time
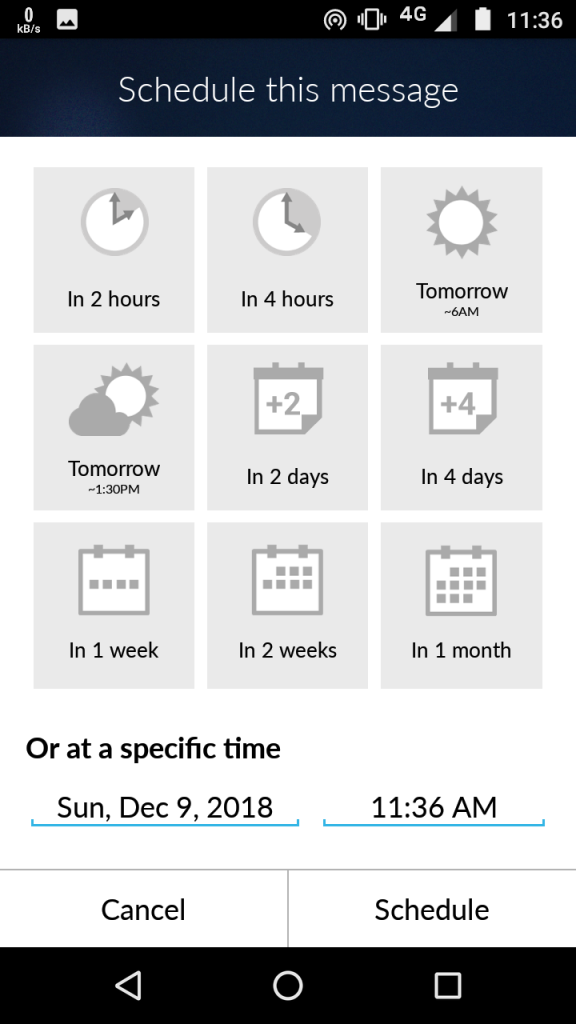
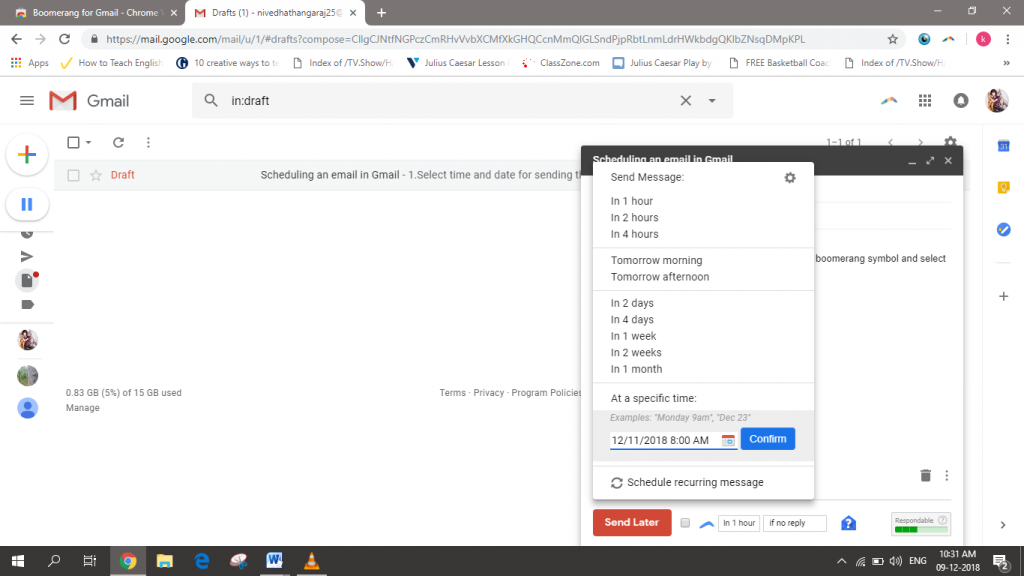
Select the time and date you want to send the mail. Once you have selected the date and time, click on confirm. For android users its schedule and not confirm. There are variety of options for selecting the date and time. You even select the specific time down to the minute. You can also set it to be sent in an hour or in two hours, even in a month!
Step 5: Authenticate and send the mail
You will be asked to authenticate when you try to schedule the mail. Make sure to enable pop-up window in Chrome. Once you have authenticated and closed the pop-up window, the mail will be scheduled. For guest posting service you can reach out to Degions.
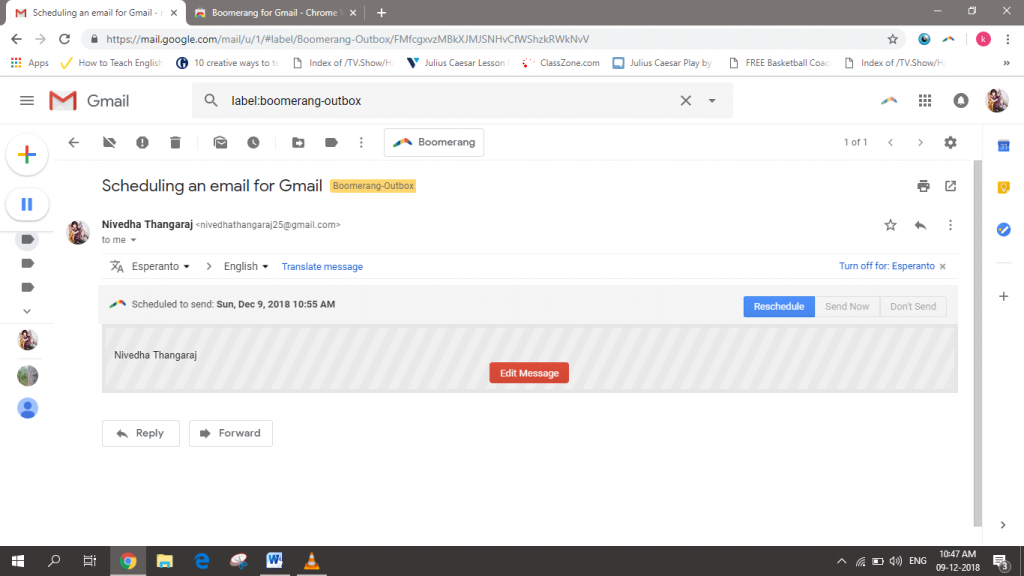
Android users need not authenticate. The authentication is only once so after that your mails will be scheduled when you click on ‘confirm’ (or tap on schedule for the android users) the email will be scheduled. You can find your email at Boomerang-outbox. You can also reschedule or cancel the mail before it is sent.
Now, one task from your to-do list can be scratched off. You no longer have to worry about sending mails on time. Simply write when you have time and schedule it.
Boomerang is mostly free. You can send 10 emails per month. If you are really invested, you can always buy it. Boomerang can do a lot more than scheduled messages. It can set reminders, organize and more. So make the most out of the extension and make your job easier.


Be the first to comment on "5 Steps to schedule an email"